Showing posts with label Holiday Crafts. Show all posts
~ DIY Valentines Wreath ~
Time for another DIY Wreath!
I found the idea of Pinterest, which I tried looking at the tutorial, but I was being redirected and the site would never load. So, here I am, with the tutorial!
You'll need:
Hot Glue Gun
Yarn (any color you'd prefer)
Red and Pink Felt
Styrofoam wreath (I preferred the one I used on the July 4th wreath, but they don't make them bigger, if you find them, PLEASE email me!)
As expected you'll need to wrap the wreath, I usually did this while watching TV. This roll of yarn actually did 2 of these wreaths. When you wrap, try to be as tight and straight as possible on 3 sides, the back really does not matter.
To secure the end of the yarn you'll need to hot glue it. I like to use alot of hot glue (don't let the picture fool you, I added more) to make sure it holds. I DO NOT cut it yet. I hot glue it, then while the hot glue is drying I (let's see if I can make this make sense) keep the yarn tight by holding it down with something (book, box, etc). This way there is not slack in the wreath from the when the hot glue was drying. Then when it's dry you can cut the end or you can leave it there because you'll still need it.
Now, I have a cricut for the hearts, all it did was make an outline for my heart, I had to manually cut them out, which is no biggie. With the 2nd one, my mom used a cookie cutter heart and cut them. Worked out fine!
Lay them out on our wreath to where you want them then hot glue them on (not too much hot glue).
If you've cut your yarn, you'll need to hot glue it again (on the back side) at the place you want to start your "X" on the hearts. If you didn't cut it then try to start your hearts around that spot. You'll make a cross across the heart then to get to the next heart you'll have to wrap a few times on the wreath form to get there. Same concept with the hot glue when you end your "X's".
And there you have it!
I'd like to get in 1 more Valentine's tutorial before the big day, but I'm not 100% I'll be able to finish it. Which means I'll need to actually buy something for the hubs for Valentines! :)
~ Merry Christmas & A DIY Wreath Tutorial ~
MIA is what I've been lately.
As I'm sure most blogs are throughout the month of December.
Christmas... family....shopping....get togethers, etc. Not to mention job #2 has me up late during the week.
Did you see my Instagram video of the surprise we did? Be sure to turn down your volume (surprise #2 had a curse word in it, sorry), and surprise #2 was blurry (sent to me from another phone).
Sadly I had SOOOO many DIY's to post, just not enough time in the day.
But today, it's Christmas. Enjoy time with your family, relax!
This year is the first year my husband has been home in 3 years for the holiday's. Super excited!
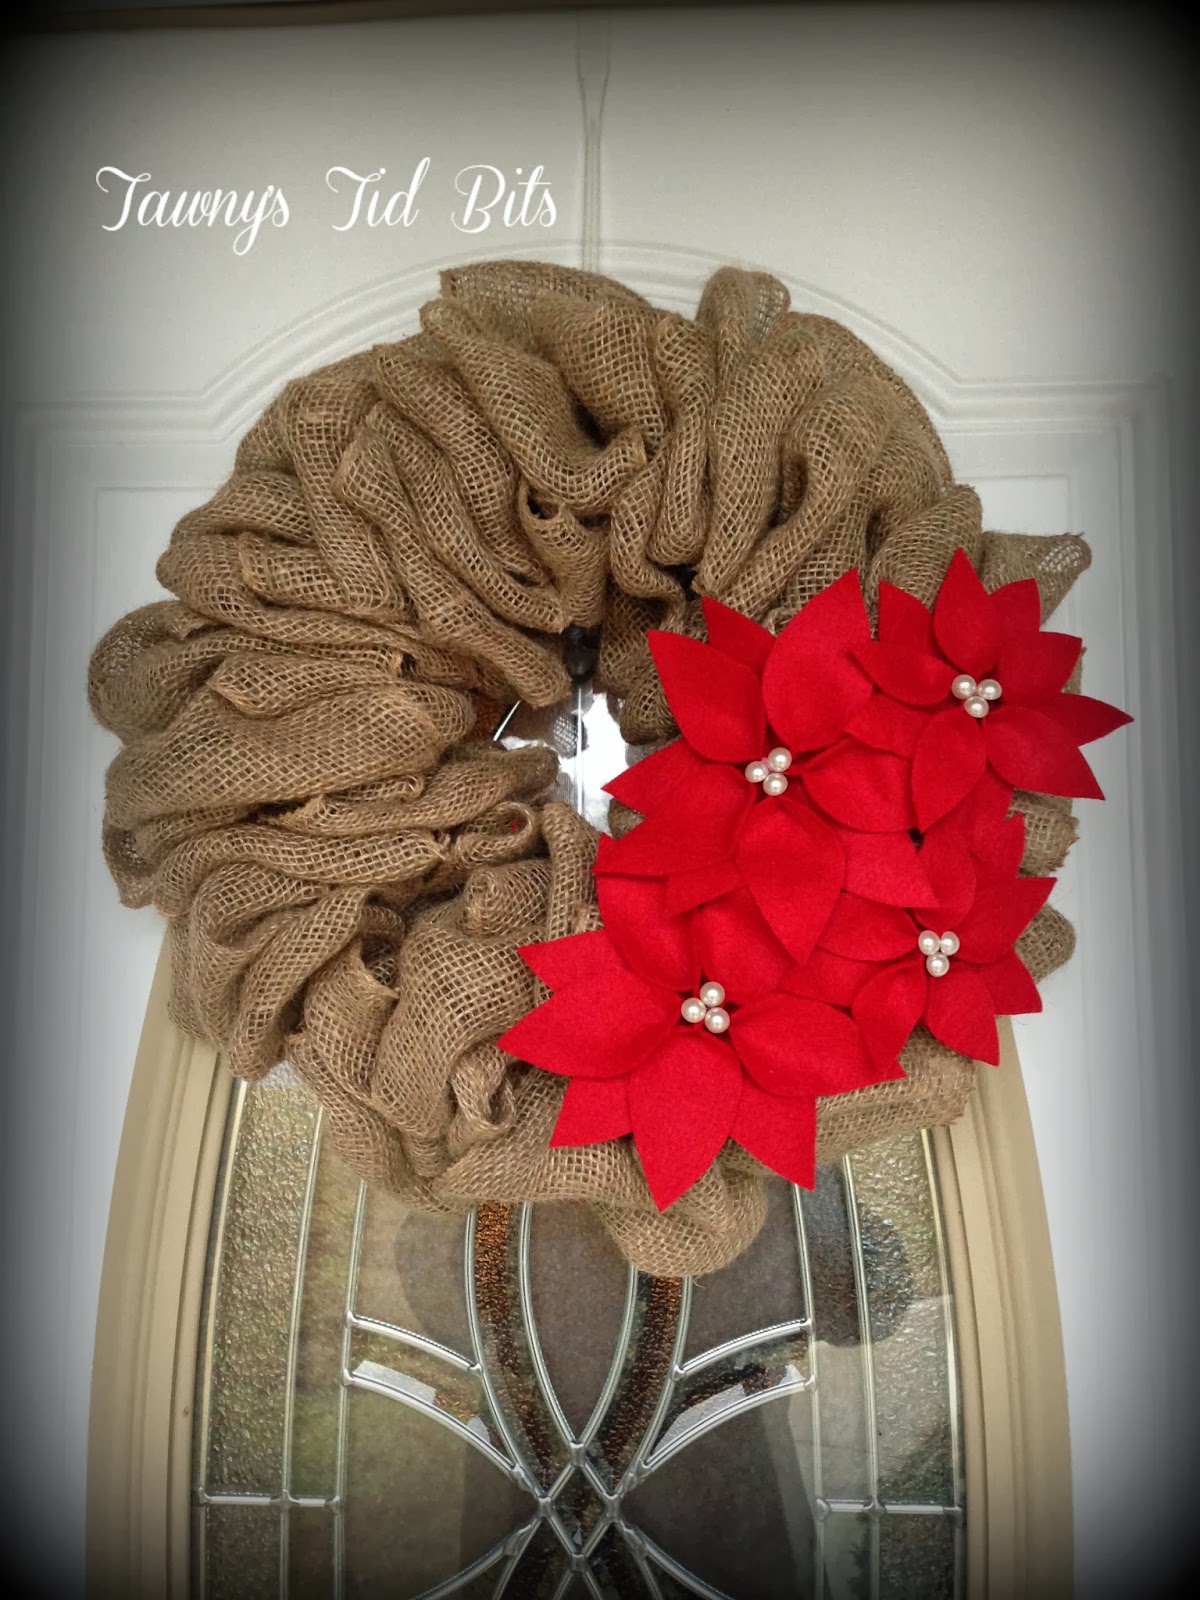
The DIY I bring you today can be for ANY time of the year. Wreaths! I wanted to do this one I found on Pinterest. Sadly, mine did not turn out the way I wanted to, maybe the placement of the Poinsetta? Who knows, but regardless, it's a wreath DIY that many of you are curious about.
For the wreath part (burlap) you'll need: burlap ribbon (5 at 15 feet each, Hobby Lobby sells them), pipe cleaner (color is up to you), wire wreath (this one is almost 12 inches in diameter).
I posted a video below and also verbal steps and pictures below that.
If you want steps (pictures below), here they are:
- Secure the beginning of your ribbon with the pipe cleaner to the wire form (from the bottom on the wreath)
- You will push up loops through each section of the wreath.
- You'll push loops up as follows: Middle, Top, Middle, Bottom, Middle, Top, Middle, Bottom, etc. Basically you'll ALWAYS go back to the middle.
- You can make the loops as tight or as loose as you want. Also as big as you want, but try to stay consistent. You you have a view bigger at the end, no problem, it's fixable.
- Once your ribbon is finish, secure it to the wreath form and start another.
| This is how I secure it. |
| Pushing the loops through (from the bottom part of wreath) |
| Slide it over, go to next section. |
| Here is one section (15 foot of ribbon) |
For the Poinsettia, the printable cut outs, directions, and "ingredient's" can be found at here Better Homes and Gardens.
It called for freezer paper, which I didn't use. I just saved some money, traced them with a permanent marker and cut inside my traced part (so no black was on the red).
I also used clips because I didn't have clothes pins. You can also use the hangers that hang up jeans, they work just as well. I used those too because I made more than enough of these, but ran out of clips, so I used those hangers, just didn't take a picture.
I ALSO used pearl stickers (that I later had to hot glue on) instead of punching out white felt like they mentioned.
Gluing these bad boys together was a hassle!!!! I wish I would have made the centers tighter, then my pearls wouldn't have looked so bad. I fixed that when I hot glued them (poinsettias) to the wreath. :)
Now you see what I mean with the placement of the Poinsettia? Maybe I should have done what the Pinterest link showed. Small, big, small?
Now the cool thing is, you can also make ornaments! Just hot glue ribbon to the back of it and there you have it!
Be sure to check out this Mesh Wreath Tutorial I posted earlier in the year. It's a totally different concept and materials, but you'll get the same effect!
~ Round up of The 12 Days of DIY Ornaments ~
BIG THANKS to everyone who participated and commented on THE 12 DAYS OF DIY ORNAMENTS! It was a GREAT success! I even threw an extra one in there, but sure to check it out!
If your are here looking for that particular ornament, click on the picture and it will bring you right there!
Oh, and just for fun, if you've got a DIY ornament you want to share, be sure to link up below!
Day 1 - Sequin Ornament
Day 2 - Wooden Letter
Day 3 - Santa Key
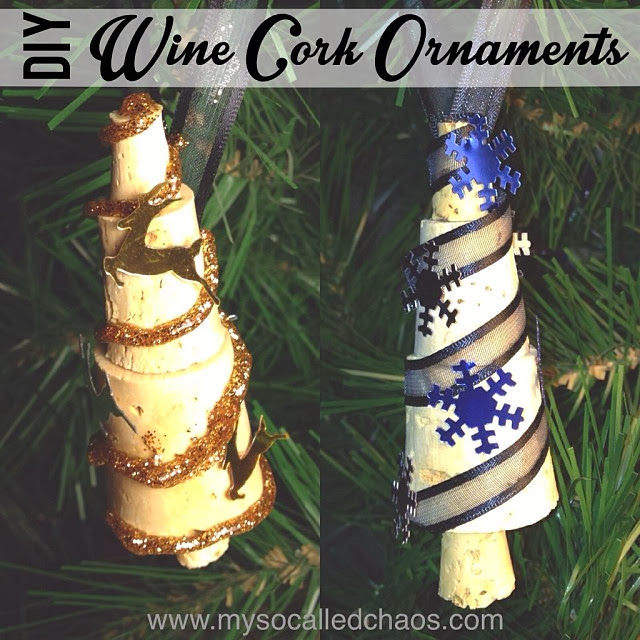
Day 4 - Cork Ornament
Day 5 - Picture Printed on Fabric (with stitching)
Day 6 - Christmas Card Ornament
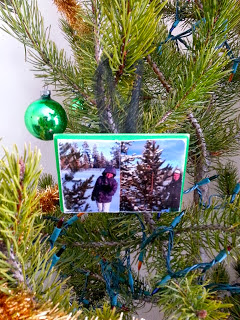
Day 7 - Picture Ornament
Day 8 - Popsicle Stick Ornament
Day 9 - Button Ornament
Day 10 - Chalkboard Ornament
Day 11 - Music Ornament
Day 12
~ Easter Mailbox Surprise ~
I am patting myself on the back for getting this one done a little early. I tend to do things at last minute then it's really too late to tell anyone about it.
I found this idea on Pinterest. I did not pin it (slap on wrist, I know) or like it because it seemed pretty self explaintory. I thought this one is just the cutest, cheapest, little idea. Who doesn't like gifts? What kid doesn't like gifts? And what a perfect way to send something from the Easter Bunny. I wish I was on the receiving end of this one to see what my nephew and neices would think of this!!!
The Pinterest picture I seen was of a normal sized egg, but I had no clue who in the world could write that small, much less read it! Don't forget, your egg has gotta have a stamp on it. So I went the route of getting a BIG plastic egg, they were at Walmart for $1.47. The eggs actually had 1 side clear and the other side colored. I told myself to just put something in there (wrapping paper) to hide the product that was in the egg. There were eggs broken apart, so I just grabbed 2 colored pieces and fit it together. So there you go.... no more clear egg.
I went to the Dollar Store (not Dollar General) and bought a pack of light up yoyos (2 for $1). And I also bought these cute little eggs that when put into water for 24 hours, crack, and there is a rubber duckie inside. I bought some candy and that plastic grass to go in the egg. I also put a little $$$ in a smaller egg.
Now here is what I wasn't looking forward to. The post office. Will they really mail this? Will they look at me like I was stupid? Yes, they will mail it. No, they won't look at you stupid, but they will admit it is a great idea. I mean, come on, technically it's just an odd shaped box, right? For $2.98 (cheapest, which was 1st class) it will be there 3/21/13. Yeah I know I'm over a week early, but oh well! It's the thought that counts, right?
So send your little one (or neices or nephews) a little something from the Easter Bunny this year, I assure you they will enjoy it!
I found this idea on Pinterest. I did not pin it (slap on wrist, I know) or like it because it seemed pretty self explaintory. I thought this one is just the cutest, cheapest, little idea. Who doesn't like gifts? What kid doesn't like gifts? And what a perfect way to send something from the Easter Bunny. I wish I was on the receiving end of this one to see what my nephew and neices would think of this!!!
The Pinterest picture I seen was of a normal sized egg, but I had no clue who in the world could write that small, much less read it! Don't forget, your egg has gotta have a stamp on it. So I went the route of getting a BIG plastic egg, they were at Walmart for $1.47. The eggs actually had 1 side clear and the other side colored. I told myself to just put something in there (wrapping paper) to hide the product that was in the egg. There were eggs broken apart, so I just grabbed 2 colored pieces and fit it together. So there you go.... no more clear egg.
I went to the Dollar Store (not Dollar General) and bought a pack of light up yoyos (2 for $1). And I also bought these cute little eggs that when put into water for 24 hours, crack, and there is a rubber duckie inside. I bought some candy and that plastic grass to go in the egg. I also put a little $$$ in a smaller egg.
| Sorry it's side ways... I have no clue why. :( |
Now here is what I wasn't looking forward to. The post office. Will they really mail this? Will they look at me like I was stupid? Yes, they will mail it. No, they won't look at you stupid, but they will admit it is a great idea. I mean, come on, technically it's just an odd shaped box, right? For $2.98 (cheapest, which was 1st class) it will be there 3/21/13. Yeah I know I'm over a week early, but oh well! It's the thought that counts, right?
So send your little one (or neices or nephews) a little something from the Easter Bunny this year, I assure you they will enjoy it!
Subscribe to:
Posts (Atom)